
Some links in this post are affiliate links. If you book through them, I may earn a small commission at no extra cost to you. It's one of the ways Wandering Emerald stays independent. Read the full disclosure.
In this guide
Flying domestically within the Philippines is one of the more straightforward travel experiences you can have. No immigration booth, no visa, no travel tax. You show up with a valid ID, check in, go through security, and board your flight. That’s the whole thing.
But if it’s your first time at an airport, even a simple process can feel unfamiliar. This guide walks you through every step, so you know exactly what to expect from the moment you arrive at the terminal to the moment you board.
If you’re planning to fly internationally, the process is more involved. I have a separate international flight guide for Filipinos that covers immigration, the travel tax, eTravel registration, and everything else that comes with leaving the country.
Step 1: What Documents Do You Need?
For domestic flights, you only need one thing: a valid government-issued ID. Any of these will work:
- Philippine passport
- Driver’s license
- PhilSys national ID
- UMID
- SSS, GSIS, or PRC ID
- Voter’s ID
- Postal ID
That’s it. No supporting documents, no bank statements, no return ticket required. Just your ID and your flight booking confirmation, which you’ll need to show at the airport entrance.
Step 2: How Early Should You Arrive?
For domestic flights, arriving 2 hours before your departure is the standard. That gives you enough time for check-in, security, and finding your gate without rushing.
During peak travel seasons, add an extra 30 minutes to that. Holy Week, the Christmas break, and the summer months of April and May are the busiest periods for domestic air travel in the Philippines. Airports like NAIA Terminal 3, Mactan-Cebu, and Clark get genuinely packed. A little extra buffer goes a long way.
Step 3: Check In and Get Your Boarding Pass
Once you’re inside the terminal, find your airline’s check-in counter. The large departure board monitors will show which counters are assigned to each flight. Present your ID and flight booking confirmation to the airline staff, then prepare your bags for weighing.
Checked Baggage
Checked baggage is the large bag or suitcase that goes in the cargo hold. For domestic flights, the allowance depends on your ticket type and airline. Budget airlines like Cebu Pacific and AirAsia Philippines typically don’t include checked baggage in their base fares. If you’re bringing a suitcase, add it to your booking online ahead of time. It’s significantly cheaper than paying at the counter.
Tag your bag with your name and a contact number before you hand it over. Taking a quick photo of your luggage is also a good habit in case you ever need to file a claim.
Hand Carry (Carry-On Baggage)
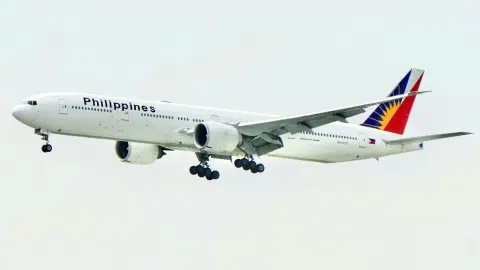
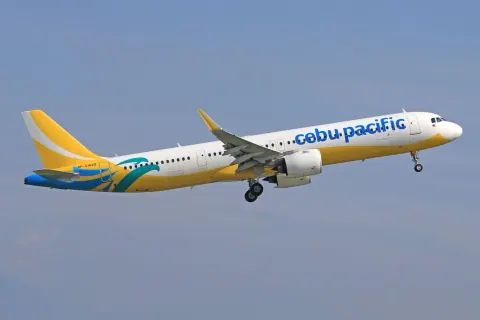
Hand carry is the bag you keep with you in the cabin. Budget airlines like Cebu Pacific typically allow 7 kg; full-service carriers like Philippine Airlines usually allow 7 to 10 kg, plus a small personal item. Your bag also needs to fit in the overhead compartment.
Budget airlines enforce hand-carry limits more strictly than full-service carriers. If you’re on Cebu Pacific or AirAsia, weigh your bag at home before you leave. Excess baggage fees at the counter are steep.
Online Check-In
Most domestic airlines allow online check-in through their websites or mobile apps. If you’re not checking a bag, online check-in lets you skip the counter entirely and go straight to security with your phone-based boarding pass.
Download your boarding pass to your phone or take a screenshot before you leave the house. Don’t rely on finding airport Wi-Fi to pull it up.
After check-in, you’ll receive a boarding pass showing your gate number and seat. Double-check that your name and flight details are correct.
Step 4: What You Can and Can’t Bring
The same baggage rules that apply to international flights apply domestically. A few to keep in mind:
Liquids
Liquids, gels, and aerosols in your carry-on must follow the 3-1-1 rule: containers of 100 mL or less, packed into one clear resealable plastic bag, one bag per passenger. Anything above 100 mL goes in your checked luggage. This covers shampoo, lotion, toothpaste, perfume, and similar items.
Powerbanks
Powerbanks must always go in your carry-on. They are never allowed in checked luggage. This is a global aviation safety rule and applies to domestic flights as well. The standard limit is up to 100 Wh, roughly 20,000 mAh.
Sharp Objects and Prohibited Items
Bladed items, scissors longer than 6 cm, and similar sharp objects must go in your checked luggage. Flammable liquids, firearms, and explosives are prohibited entirely. When in doubt, check your airline’s prohibited items list before you pack.
Step 5: Security Screening
Domestic security moves faster than international because there’s no immigration involved, but the process is the same. Your bags go through an X-ray machine, and you walk through a body scanner or metal detector.
- Keep metal accessories minimal. Belts, watches, and metal-buckle sandals will set off the scanner. Slip-on shoes help.
- Have your liquids bag near the top of your carry-on so it’s easy to pull out.
- Take your laptop out and place it in a separate tray before the conveyor.
- Remove your jacket if you’re wearing one; you may be asked to run it through the X-ray separately.
Step 6: Find Your Gate and Board
After security, check your boarding pass for your gate number and confirm it on the departure board. Domestic terminals are generally smaller and easier to navigate than international ones, but give yourself a few minutes to walk if your gate is at the far end.
While you wait to board, keep an ear on announcements and glance at the departure monitors periodically. Gates can change. It’s also a good window to grab something to eat, or just sit and people-watch.
Boarding typically begins 30 minutes before departure for domestic flights. Have your boarding pass and ID ready when your row or group is called. Stow your carry-on in the overhead bin, settle in, and you’re done.
A Quick Comparison: Domestic vs. International Flights
If you’ve read the international guide and are wondering how the two compare, here’s the short version:
| Domestic | International | |
|---|---|---|
| Documents needed | Valid government ID | Passport (+ visa if required) |
| Travel tax | None | Required for Filipinos |
| eTravel registration | Not required | Required |
| Immigration | None | Philippine departure immigration |
| Arrive how early | 2 hours before | 3 to 4 hours before |
| Baggage rules | Same liquids and powerbank rules | Same liquids and powerbank rules |
| Online check-in | Available for most airlines | Available for most airlines |
Frequently asked questions
Do I need a passport to fly domestically in the Philippines?
No. A passport works as an ID, but it’s not required. Any valid government-issued ID will do: driver’s license, PhilSys national ID, UMID, voter’s ID, and others are all accepted.
Can I bring food on a domestic flight?
Yes. Solid food is allowed in both carry-on and checked baggage. Liquids and semi-liquids (soups, sauces, jams, bottled drinks) in your carry-on still need to follow the 100 mL rule. If you’re bringing pasalubong in liquid or gel form, pack it in your checked bag.
What if I only have hand carry? Can I skip the check-in counter?
Yes, if you’ve done online check-in. Download your boarding pass to your phone before you leave home, and you can go straight to security. Check whether your airport has a dedicated online check-in lane, which moves faster.
Can I put my powerbank in my checked luggage?
No. Powerbanks must always be in your carry-on, on domestic and international flights alike. This is a firm aviation safety rule, not an airline preference.
How strict are budget airlines about hand-carry weight?
Cebu Pacific and AirAsia Philippines can be strict, especially on busy routes. They do weigh carry-on bags at the gate on some flights. Weigh your bag at home before you leave and stay within the limit. The excess baggage fee at the counter is much higher than adding baggage during online booking.
What should I do if my flight is delayed or cancelled?
Go to your airline’s service counter at the airport. Under Philippine law, airlines are required to provide meals, refreshments, or vouchers for significant delays, and to rebook or refund passengers in the case of cancellations. Keep your boarding pass and booking confirmation accessible. If you booked through a third-party site, contact both the site and the airline.
Are there things I should book in advance for my destination?
For popular destinations like Palawan, Siargao, Bohol, and Cebu, it’s worth booking activities ahead of time, especially during peak season. I book tours and experiences through Klook, which lets you skip the hassle of negotiating on the ground and shows you what’s available before you arrive.
Domestic flying in the Philippines is genuinely easy once you’ve done it once. The archipelago has over 7,600 islands, and a one-hour flight can take you somewhere that would otherwise be an entire day of travel by sea. That access is worth getting comfortable with.
When you’re ready to fly internationally, the process is more involved but still very manageable. Start with the international flight guide for Filipinos for a full walkthrough.
Wander deeper,
Merald